Product Overview
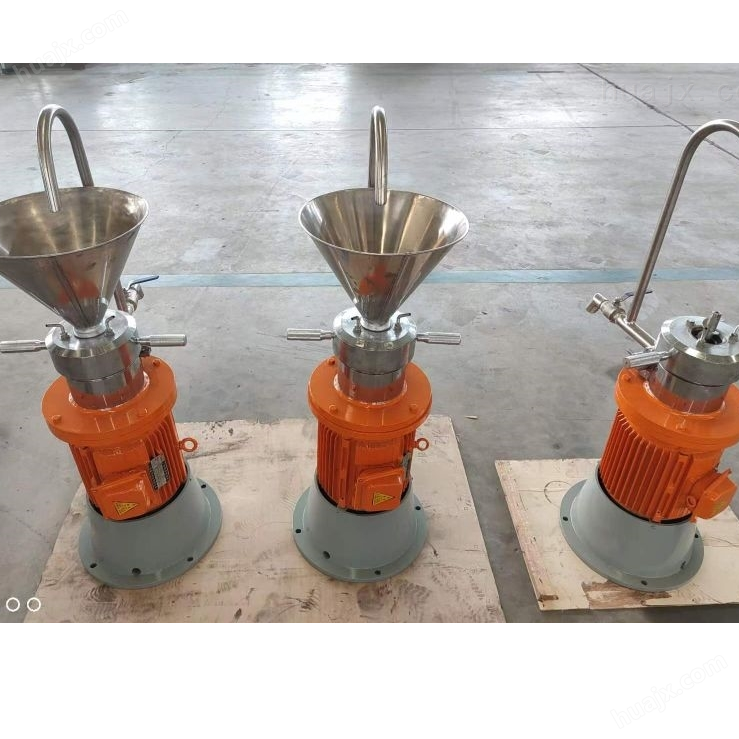
Advantages of stainless steel vertical colloid mill structure
1. Internal tooth structure, small volume, low energy consumption;
2. Imported stator and rotor core components, made of corrosion-resistant and wear-resistant materials, ensuring a lifespan of over 200000 tons.
3. The colloid mill motor is controlled by a frequency converter, with low current impact and adjustable speed according to requirements.
4. The gap between colloid mills can be adjusted within the range of 0.1-5mm.
Precautions and maintenance installation steps for stainless steel vertical colloid mill
1. The equipment is horizontally installed on a flat concrete foundation and fixed with anchor screws (it may not be fixed according to the working conditions).
2. Check if all fastening screws are tightened (the rotor center screw is an M12 left-hand screw).
3. Before use, use a wrench to rotate the rotor and check if it is in contact with the stator and if there is any jamming. If any of the above conditions are found, do not start the machine.
4. Check and connect the power cord (three-phase AC, voltage of 380 volts, body protective grounding), and pay attention to the direction of rotor rotation, which should be aligned with the arrow on the base pointing to * (clockwise rotation).
5. Connect the cooling water and pay attention to the inlet and outlet signs of the water nozzle.
6. When starting the motor, first jog the switch to check for any noise or vibration. If the situation is abnormal, the machine should be stopped immediately, and the fault should be eliminated before trying to operate again.
7. When cleaning residual materials inside the stator and rotor after work, it should be done while they are in operation. First, rotate the large chuck counterclockwise by no less than 90 ° before cleaning.
8. Adjustment method for clearance between stator and rotor (adjustment should be carried out in operation):
a、 Loosen two handles b, move the handles to drive the large card disc to rotate, adjust the gap, and rotate the positioning disc clockwise to reduce the gap and refine the material particle size. The clearance increases when rotating counterclockwise, and the material particle size becomes coarse.
c、 After adjusting the clearance between the stator and rotor, both handles should be tightened simultaneously (clockwise).
d、 According to the particle size and batch requirements of the processed materials, the limit screw can be adjusted to achieve the limit purpose after selecting the clearance between the stator and rotor.
9. The butter cup should be regularly oiled.
10. Requirements for processed materials:
a、 Cannot process dry solid materials, only wet processing can be performed.
b、 Before grinding the material, impurities should be present. The particle size of the material should be less than 1mm, and the hardness of the material should not exceed HV309. It is strictly prohibited for hard objects such as iron and crushed stone particles to enter the grinding head to prevent damage to the machine.
11. According to the material processing requirements, one or more grinding can be carried out, and several experiments should be conducted before grinding to ensure clearance and flow rate.
12. Pay close attention to the grinding process and running time before use. If there is any abnormal situation, the machine should be stopped immediately and disassembled for inspection.
13. Disassembly of stator assembly (please note that stator assemblies one, two, and three cannot be disassembled). First, remove the hopper and the inlet and outlet nozzles, loosen the cap screws, remove the dial, hold the handle, rotate counterclockwise to remove the large chuck, and lift up the grinding head cover to remove the stator assembly.
14. Dismantling of rotor assembly (please note that the first and second stage rotors of the rotor assembly are of good quality and cannot be disassembled). After extracting the stator, remove the discharge port and unscrew the left-hand screw to remove the rotor and impeller. The assembly of the rotor and stator can be carried out in the opposite order as above, and each part should be cleaned thoroughly before assembly. During installation, it is necessary to apply lubricating oil that meets the requirements to each contact surface and threaded part before assembly.
15. After using or not using the colloid mill for a short period of time, the inner cavity should be cleaned well to prevent corrosion, and dried with high-pressure air. When cleaning, choose the appropriate cleaning agent according to different materials, but ensure that the sealing components are not damaged (the sealing component material should be nitrile rubber).
16. When disassembling and assembling, attention should be paid to ensuring that all sealing rings are not damaged, installed incorrectly, or lost.